
Drawing dinosaurs for kids has never been easier! These beings that once ruled the Earth have now completely disappeared. That doesn't mean we can't enjoy their presence by drawing or sketching some of them when we have a few minutes instead of wasting them!
Feel free to unleash your creativity and come up with new characters. Before we move into it, I'm sure you might like this turtle step by step instructions.
Dinosaurs are gone, but it's pretty easy to come up with and draw new shapes and types of these animals that probably didn't exist 65 million years ago (but no one will ever know!).
Twenty step-by-step lessons are devoted to show you how easy it is to draw a dinosaur let's dive in!
How to draw Cartoon and Jurassic world dinosaur in 7 easy steps
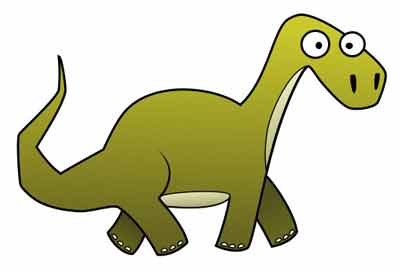
This adorable cute Jurassic world dinosaur will be easy for a child to draw. You don't need to be an expert in drawing. Just take your time and sketch out all the main shapes slowly and carefully. You will see that even without practice, this hero is not that difficult to reproduce!
Step 1
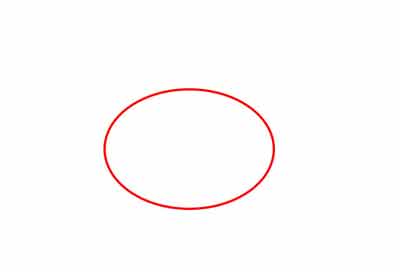
Draw an oval.
Step 2
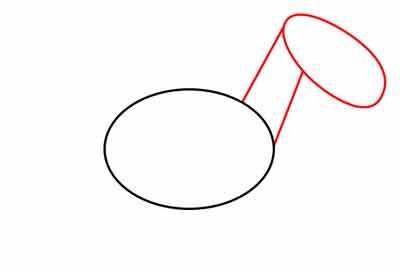
Draw another smaller oval a little higher and to the right. At the same time, its upper edge should be slightly sharper than the lower one. Connect these shapes with two straight lines.
Step 3
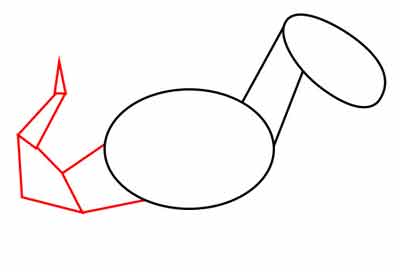
We draw a ponytail. Its base and middle consist of three complex quadrangles, and the tip of an acute triangle.
Step 4
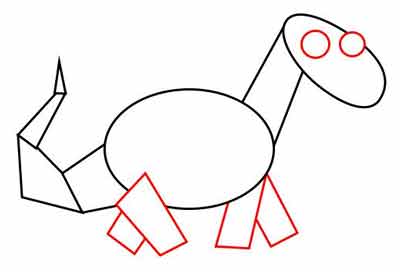
Draw four intricate quads at the bottom of the larger oval for the legs and two small circles for the eyes on the top oval.
Step 5
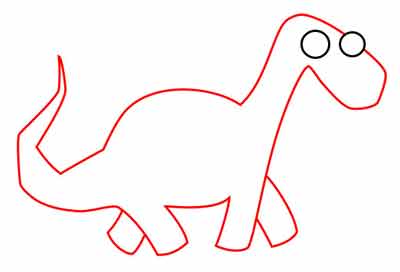
Delete the auxiliary lines inside and draw the outline more clearly with a pencil or felt-tip pen.
Step 6
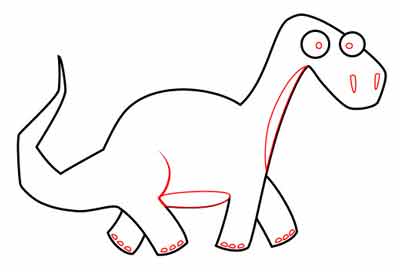
Add a few more small details to the dinosaur: nostrils, pupils, claws, spots on the stomach and neck.
Step 7
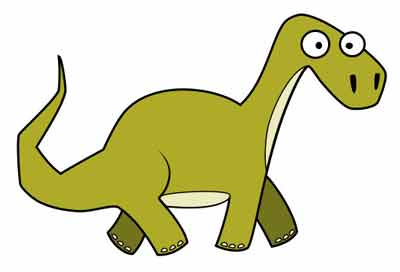
Color it with colored pencils, paints or felt-tip pens. That's it, easy and fast! It looks so much like the real one, but it's a cartoon and Jurassic world dinosaur image.
Outline Realistic Dinosaur head in 8 steps
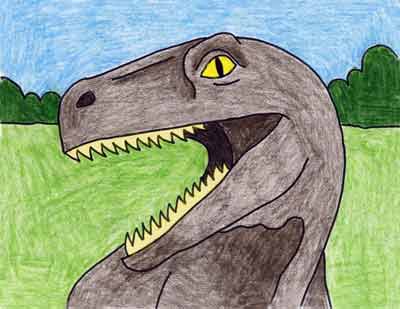
Here's how to draw a gridded portrait of a dinosaur with all of its teeth visible. A child of 8-10 years old will cope with such a pattern.
Step 1

Draw a curve as shown.
Step 2
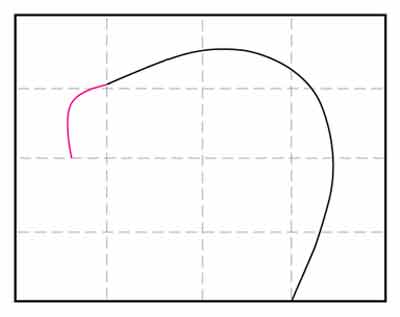
Continue the line down to make the nose.
Step 3
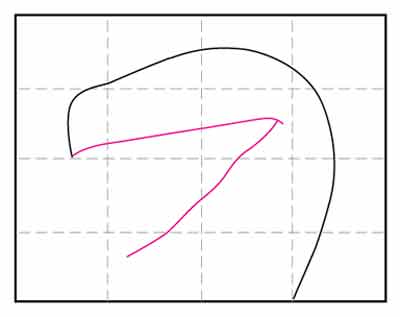
Continue the line to draw the mouth.
Step 4
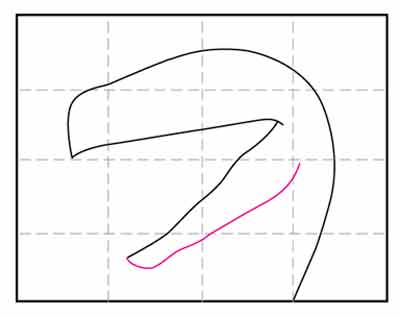
Add a chin below.
Step 5
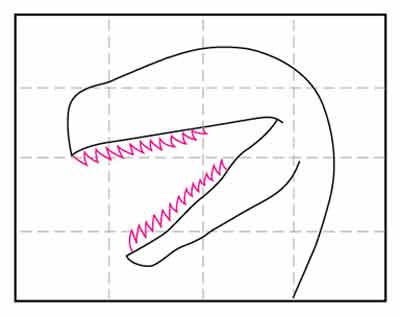
Add the top and bottom row of teeth.
Step 6

Finish the lines of the body and mouth.
Step 7
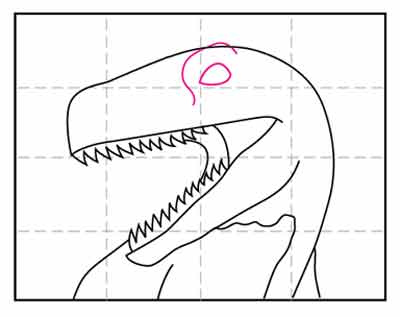
Draw an eye.
Step 8
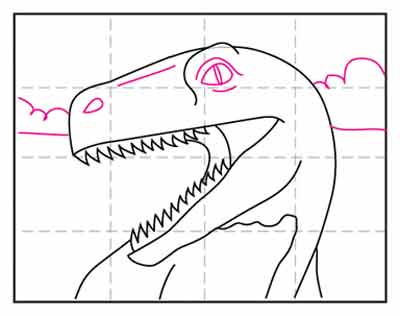
Complete the eyes and small details. Draw the background.
Step 9
Color the drawing with colored pencils, circle the contours with a black felt-tip pen.
How to draw Dacentrur in 7 steps
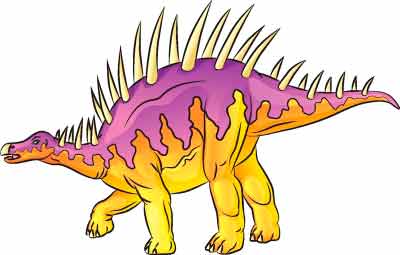
Don't be afraid of Dacentrur's sharp spikes - with easy steps, even a beginner will draw this dinosaur in no time.
Here we will show you an illustration of each step and then we will give a description of how to draw it. Follow the red lines on each illustration to see exactly what to draw in this step. The lines drawn in the previous steps are shown in grey.
Ready to start? Excellent!
Step 1
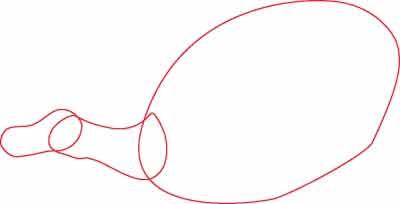
Draw the head and body.
Draw a large oval for the body. Add a peanut shape for the head and then connect the head to the body with a curved neck shape.
Step 2
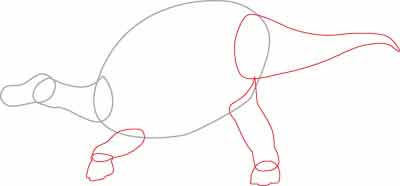
Add tail and legs
Draw a pointed shape for the tail, with a slight curve at the end. Add a rounded oblong shape for the back leg on the right side of the oval torso and another peanut shape for the front leg on the left side of the torso. Draw shapes for the foot on the bottom of each leg.
Step 3
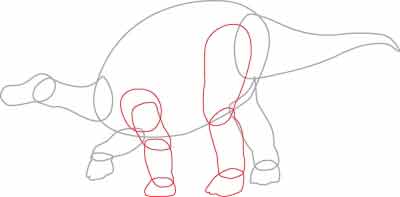
Add Opposite Legs
For the back leg on the near side of us, draw a long, oblong shape for the thigh and a rounded rectangle for the lower leg. Add a foot shape to the bottom of the calf. The front leg should have a circle for the shoulder, a rounded oblong shape for the top, and a rounded rectangle for the shin. Also draw the shape for the bottom of the foot.
Also read my Realistic owl sketching guide
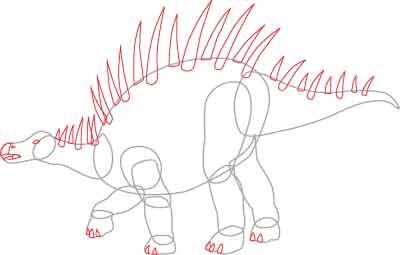
Draw Thorns
Draw long, curved triangles along the back of the dinosaur to represent the spikes. Add an oval for the eye and a teardrop for the nostril. Draw two more curved lines to indicate the mouth. Draw nails on each foot.
Step 5
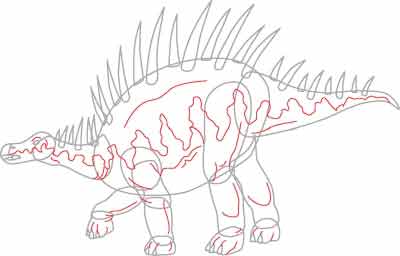
Add a pattern on the skin
Draw detailed lines on the body to show muscles, skin folds. Draw a wavy line from the tip of the tail to the tip of the nose to detail the skin color.
Step 6
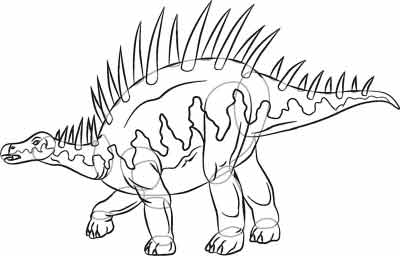
Add final details
With a felt-tip pen, trace the contours and details that you want to keep, and erase the extra pencil lines.
Step 7
Color the drawing with paints, colored pencils or felt-tip pens.
Dinosaur finished! Even if you don't get it perfect the first time, keep practicing until you're happy with your drawing.
How to draw Ankylosaurus in 8 steps
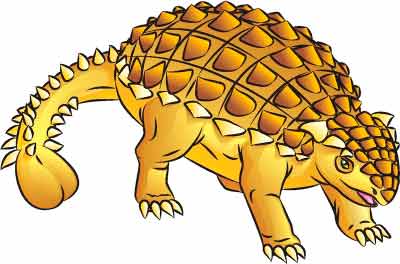
Dinosaur Ankylosaurus is unique in every way - it had a mace at the end of its tail, armor covering its body, and spikes covering its armor. You will have a great time learning how easy it is to draw this amazing dinosaur step by step.
Step 1
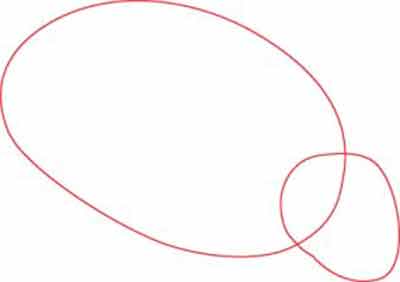
Draw a large oval for the body and a smaller rounded shape for the head just below.
Step 2
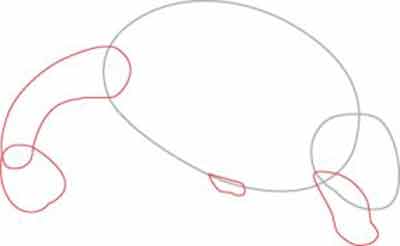
Add a thick, curved shape like macaroni to make the tail. Draw another rounded triangle to form a club at the end of the tail. Draw two more shapes as shown to form the legs on the far side of us.
Step 3
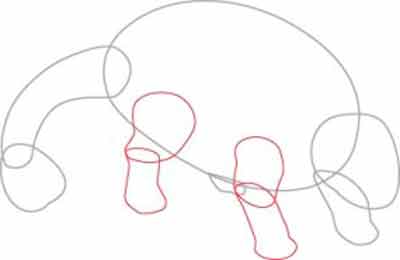
The legs on the near side of Ankylosaurus consist of two parts. These shapes should overlap each other a little, as you can see in the picture. The shins widen slightly at the bottom to form the foot.
Step 4
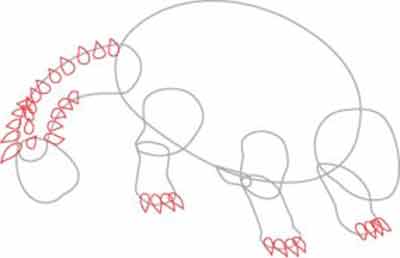
Draw four teardrops on each leg to make the claws. Add more teardrops along the tail for spikes.
Step 5
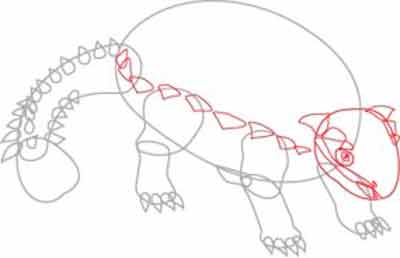
Draw triangles along the body to start shaping the upper shell of the armor. Add more triangles on the head for spikes. Divide the head to indicate the mouth and lower jaw. Draw circles for the eyes and pupils. Draw a small teardrop shape on the front of the snout for the nostril.
Step 6
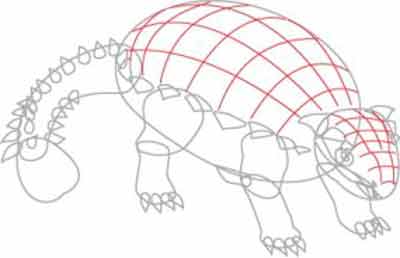
Draw curved lines on the back and head of the ankylosaurus in a grid pattern. It is needed to determine how the spikes on the dinosaur's armor are located.
Step 7
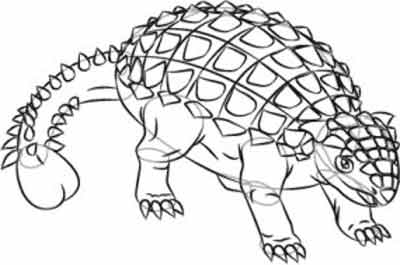
Draw armor spikes in each cell of the grid. Add detailed lines on the legs, belly and tail.
Step 8
Circle the lines you want to keep with a felt-tip pen and erase any excess. Color the Ankylosaurus with colored pencils, felt-tip pens or paints. Do not forget to depict the play of shadows so that it looks voluminous.
Your dinosaur is finished!
How to draw bactrosaurus in 8 steps

With its pointed crests, muscular body, and strong tail, Bactrosaurus must have been a terrifying sight. But don't be afraid to draw this dinosaur - it's easy if you follow these steps.
Step 1
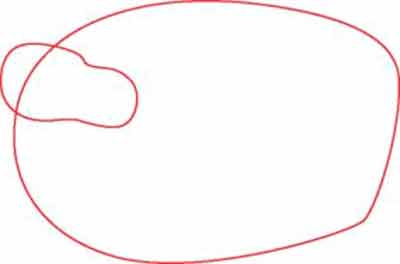
Draw an oval with one flat end for the body. Add an overlaying peanut-shaped shape for the head on the left.
Step 2
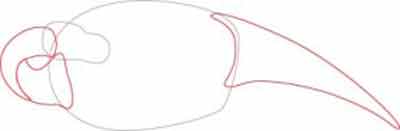
Draw a long, pointed shape for the tail. The bactrosaurus will be facing backwards, so draw a curved shape from the back of the head to show one side of the neck turning back towards the body. Add another shape coming from the body to join the other side of the neck.
Step 3
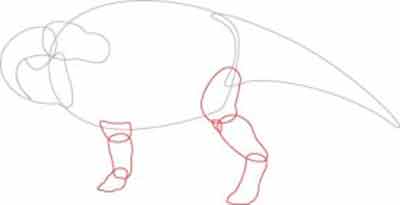
Draw the legs on the far side of the body, using overlapping three-part shapes.
The front leg should have a bold crescent shape for the upper leg, a long oval for the midfoot, and a bell shape for the foot.
For the back leg, draw a small potato shape for the thigh and a peanut shape for the drumstick. In front of where the two shapes overlap, add a small, rounded triangle to represent the knee. Then draw the shape for the foot.
Step 4
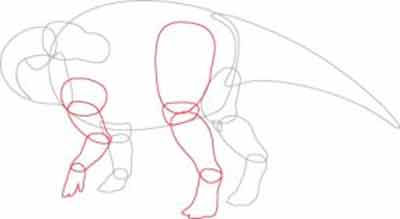
The legs on the side of the body closest to us are also drawn using overlapping shapes. Look closely at how the joints bend at the knee and ankle.
For the front leg, draw an almost circular oval for the shoulder, then two peanut-shaped shapes for the top and bottom of the leg. Draw a hoof from below.
Let's move on to the back leg. Draw an egg shape for the thigh and an oval below for the knee. Add a longer peanut shape for the drumstick and a bottom shape for the paw.
Step 5
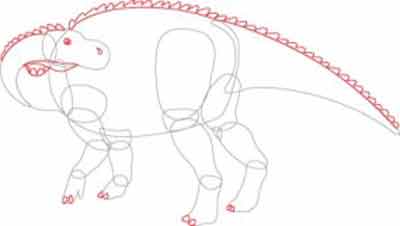
Draw curves along the top of the head, neck, and spine. Add a tear for the nostril and one circle inside the other for the eye. Draw a sagging bag on the lower part of the neck, this will be the throat. Draw claws on each foot.
Step 6
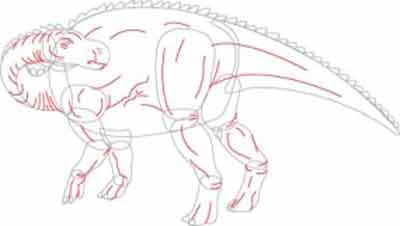
Draw curved lines to indicate the details of the dinosaur. The lines on the legs and tail will show the muscles. The lines you add on the neck and belly will show wrinkles in the skin.
Step 7
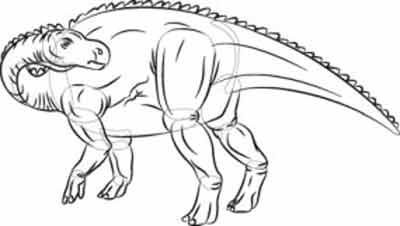
Circle the pencil lines you want to keep with a felt-tip pen. Erase all extra lines and then the Bactrosaurus will be ready for coloring.
Step 8
Color the dinosaur.
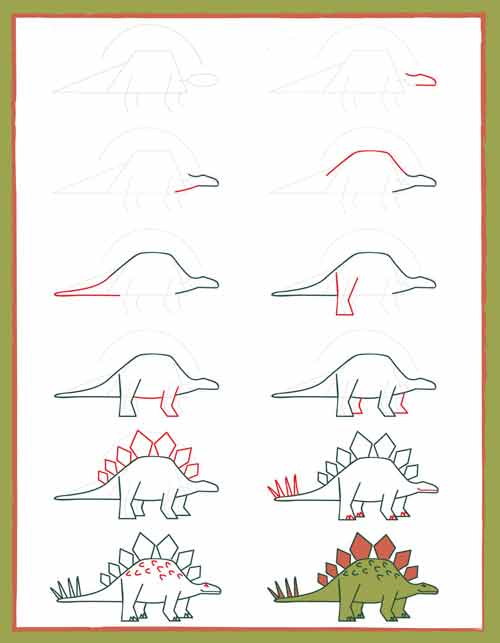
Learn to draw Stegosaurus in 12 easy steps
Stegosaurus is one of the many plate-covered dinosaurs of the late Jurassic period (159 million to 144 million years ago), recognizable by its spiked tail and a series of large triangular bony plates along its back. Herbivorous Stegosaurus usually reached a length of about 6.5 meters, but some individuals grew up to 9 meters.
He had a very small skull for such a large animal, and the brain was no larger than an apple.
If you like this unusual dinosaur, it's easy to draw.
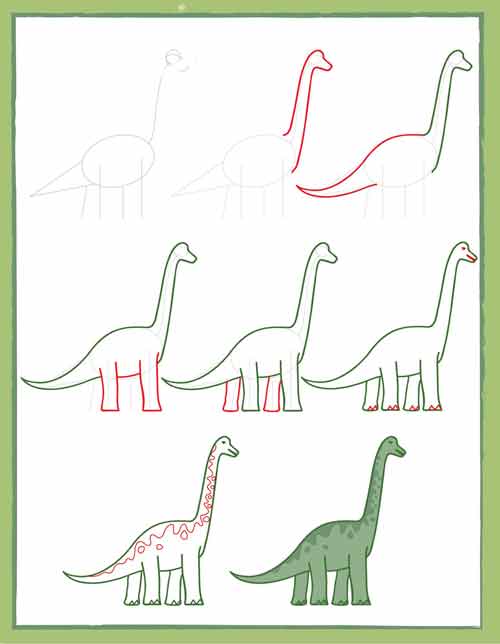
Sketch Brachiosaurus in 8 steps
Brachiosaurus was an unusual dinosaur that lived from 155.7 million to 150.8 million years ago in North America. This dinosaur was unlike any other animal that lived in the region.
Its long neck made it look like a giraffe, and its front legs were longer than its hind legs.
Scientists have calculated that the growth of this giant reached 25 meters, and weight - 62 tons. Brachiosaurus ate plant foods and ate up to 400 kilograms a day.
Tyrannosaurus Rex in 10 steps
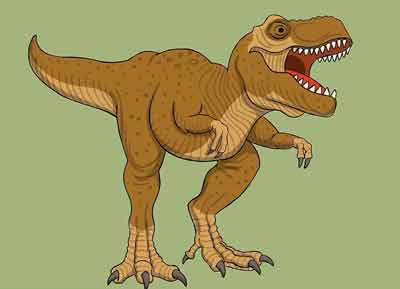
Tyrannosaurus Rex is one of the largest carnivorous dinosaurs ever. This ferocious, eleven-meter monster had muscular legs and a massive tail, which gave him the ability to move at high speed.
He had a powerful jaw and conical teeth and could eat up to 230 kilograms of meat in one bite.
Luckily for us, dinosaurs died out 65 million years ago and we can safely and easily draw one of these giants.
Step 1
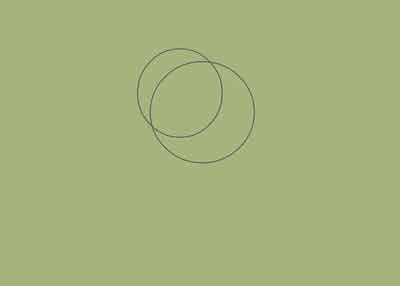
Draw two circles overlapping each other. The left circle is slightly smaller than the one on the right.
Step 2
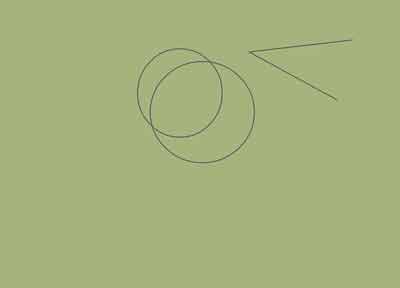
To the right of the circles, draw two straight lines intersecting at an acute angle, they form the letter "V"
Step 3
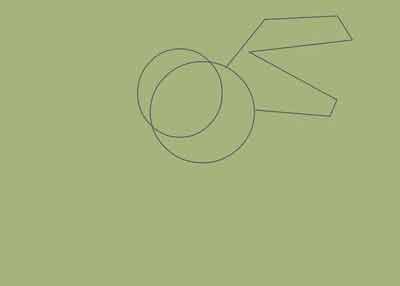
Connect the "V" to the larger circle using straight lines.
Step 4
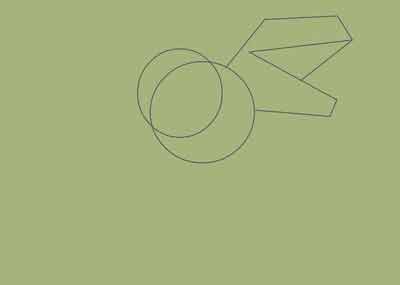
Connect with another straight line the top edge of the "V" to the middle of its bottom side.
Step 5
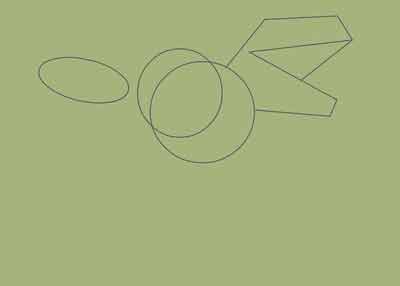
To the left of our construction, draw an oval at the level of the smaller circle.
Step 6
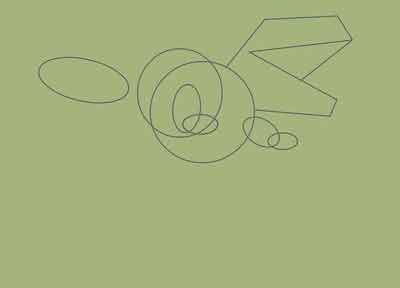
Draw two pairs of overlapping ellipses. The first pair is inside the smaller circle, the second one crosses the right edge of the larger circle.
Step 7
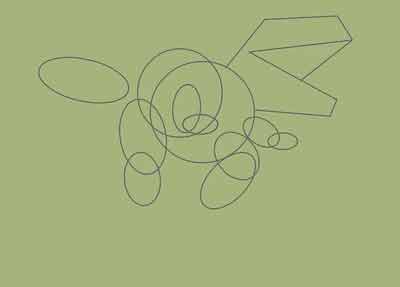
We proceed to the hind legs of the dinosaur. To do this, again draw two pairs of intersecting ellipses from the bottom right and bottom left of the larger circle.
Step 8
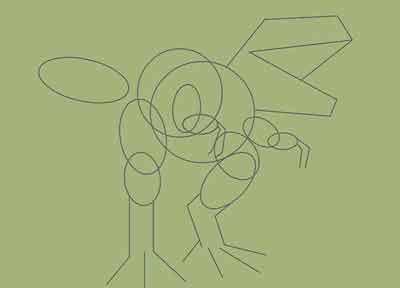
Using a few straight lines, outline the lower legs of the dinosaur.
Step 9
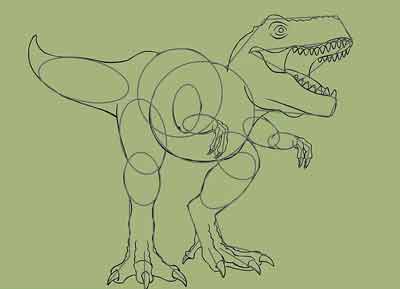
Using the available auxiliary shapes, trace the outline of the Tyrannosaurus Rex, adding small details: a curved tail, "chicken feet" with claws, two rows of powerful teeth, an eye. Outline the "V" shape with smooth, curved lines to get the muzzle.
Step 10
Color the dinosaur to give it a realistic look.
Little dinosaur in 13 steps

This way to draw a cute cartoon dinosaur is suitable for a 5-8 year old child.
Step 1

Draw a circle.
Step 2
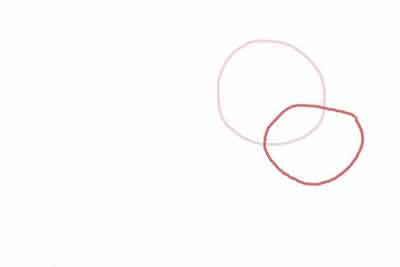
Draw a figure similar to an egg a little lower and to the right. Thus we outline the head.
Step 3
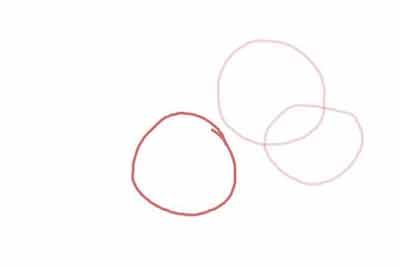
To the left and just below these two circles, draw another one for the torso.
Step 4
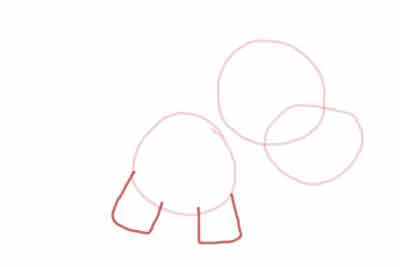
Form his legs from the bottom of the left circle.
Step 5
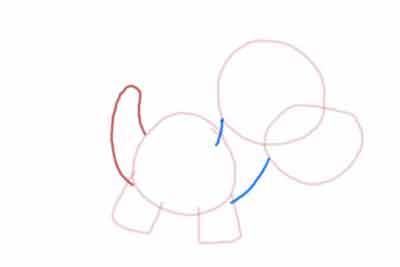
Draw the tail and neck of the dinosaur.
Step 6
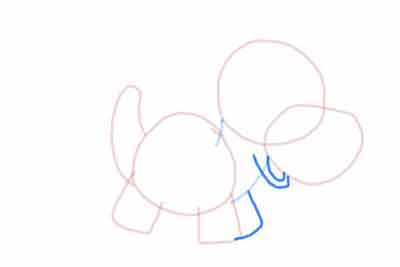
Complete the drawing by depicting the back leg and mouth.
Step 7
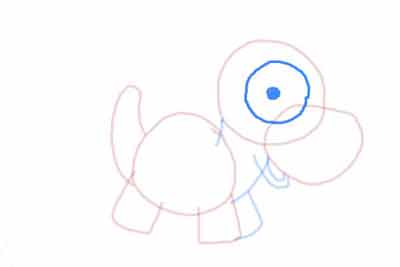
Add a huge eye.
Step 8
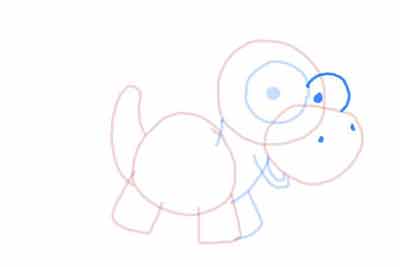
Add a second eye on the far side from us and two dots on the muzzle for the nostrils.
Step 9
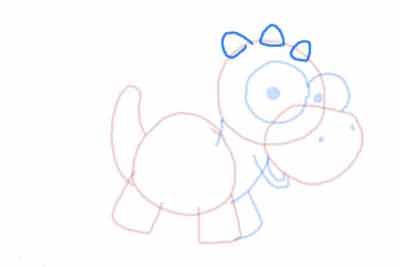
Draw three small triangles with rounded corners on the head for the young dinosaur's crest.
Step 10
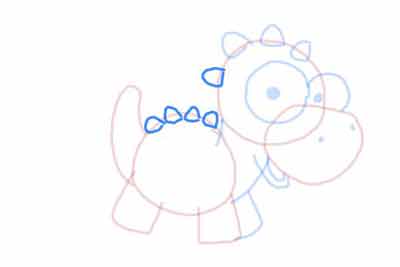
Add another triangle on the head on the left and four on the back for the crest.
Step 11
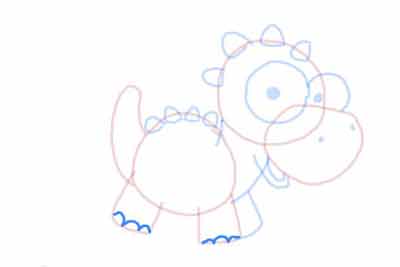
Focus on the shape of his claws.
Step 12
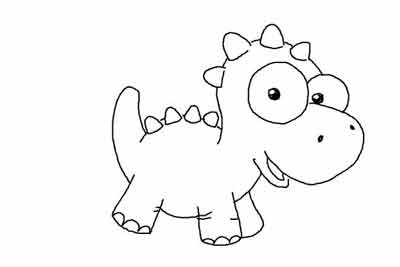
Draw around the contour and the necessary details of the image with a felt-tip pen, add a few curved lines on the legs, indicating the skin folds. Erase extra auxiliary lines.
Step 13
The final touch is to color the dinosaur with green and white colors with felt-tip pens, paints or colored pencils.
Gorgosaurus Drawing "Walking with Dinosaurs" in 10 steps
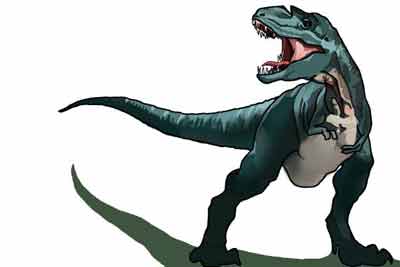
Want to improve your drawing skills? We offer another way to draw a Gorgosaurus dinosaur. This is a theropod dinosaur, the hero of the movie "Walking with Dinosaurs" named Gordon.
Gorgosaurus lived in packs consisting of several females and cubs. The family was headed by one male. They hunted collectively, and even showed a certain degree of cooperation in this activity. But during the division of prey, dinosaurs became aggressive and bloodthirsty towards each other, fighting for food.
Step 1

Draw three egg shapes overlapping each other for the head and neck.
Step 2
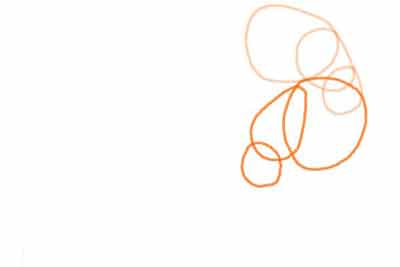
Now repeat almost the same design just below the first in a mirror image for the torso.
Step 3
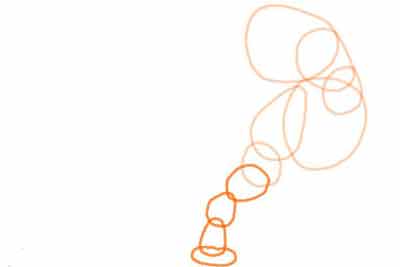
Draw four more irregular ovals below the previous design. They should overlap each other a little for the leg closest to us.
Step 4
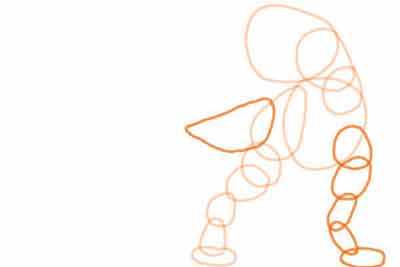
Draw a row of five slightly intersecting ovals for the leg farthest from us. Draw a teardrop shape on the left side, indicating the tail.
Step 5
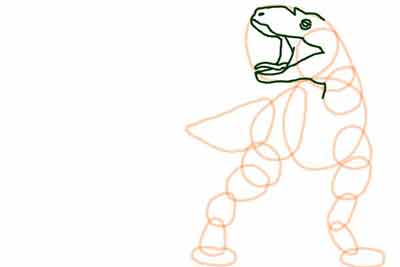
In the upper ellipse, draw a muzzle.
Step 6
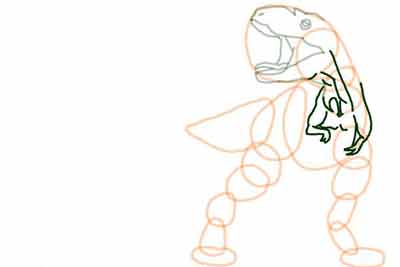
Draw the front legs and neck of the dinosaur.
Step 7
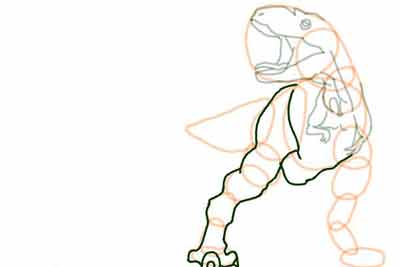
Outline the auxiliary figures, depicting his right powerful leg and torso.
Step 8
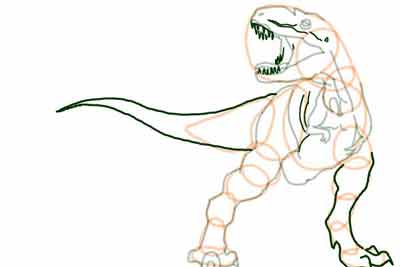
Outline the left leg, the long, pointed tail, the intimidating teeth, and the creases in the face.
Step 9
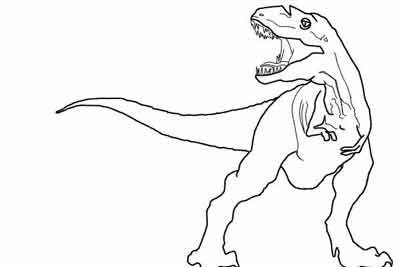
Outline the outline of the dinosaur. Mark the skin folds and muscles with thin curved lines.
Step 10
Color Gordon to give him a realistic look.
Spinosaurus in 10 steps
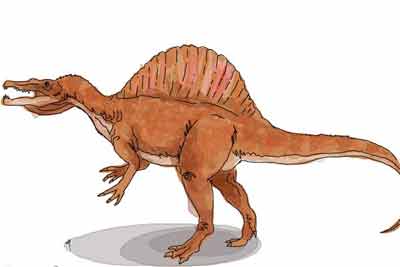
We're all familiar with the Tyrannosaurus Rex, a massive Cretaceous therapod dinosaur and the star of several movies about dinosaurs eating people. However, millions of years ago, there were even larger, potentially more fearsome beasts on Earth.
Spinosaurus is even bigger than a T-rex, and new discoveries show you wouldn't be safe even in the water. It turns out that the Spinosaurus was an excellent swimmer thanks to its large paddle-shaped tail.
Spinosaurus was a theropod similar to Tyrannosaurus - meaning that it had hollow bones and three-toed limbs. Theropod descendants most likely evolved into modern birds, but Spinosaurus is more dangerous than any bird. Adults could weigh up to 7.5 tons and have a height of more than fifteen meters! Which makes them one of the largest dinosaurs.
Now that we are no longer in danger, we can safely draw it, following the step-by-step instructions.
Step 1
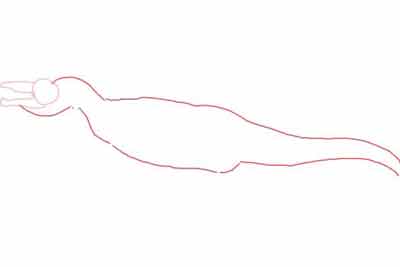
Draw the torso and head of the dinosaur.
Step 2
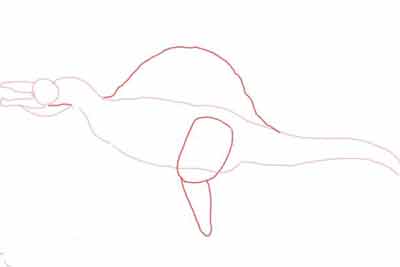
Add a wheel-shaped outgrowth on the back. Draw an irregularly shaped oval, and below it a triangle with rounded edges for the leg.
Step 3
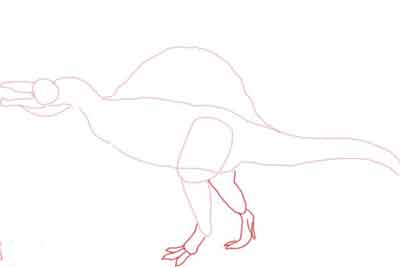
Draw the long leg from us and finish the near one, adding a three-toed foot, like a bird.
Step 4
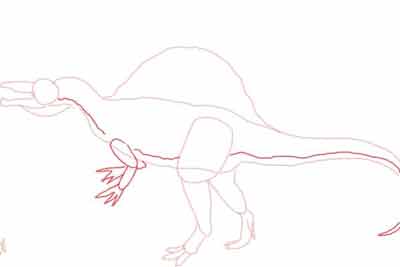
Draw short front legs and a long curved line along the body - you will need it for coloring the dinosaur.
Step 5
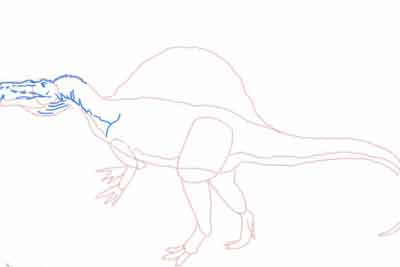
Draw a sharp, toothy muzzle and neck.
Step 6
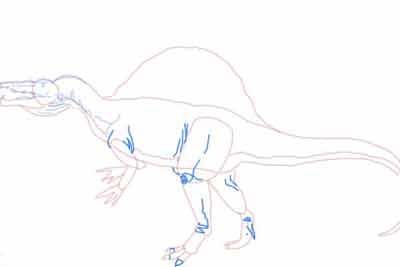
Using curved, jerky lines, mark the folds of the skin and muscles of this powerful predator.
Step 7
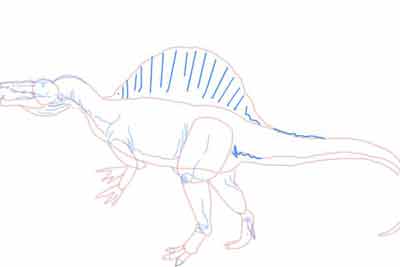
In short segments, mark the texture of the "hump"
Step 8
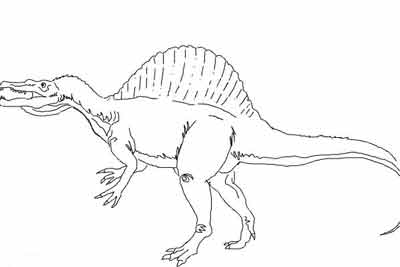
Draw the outline and small details. Erase unnecessary lines.
Step 10
Color this handsome man as in the picture. All is ready.
Kawaii Dinosaur Drawing in 10 Steps
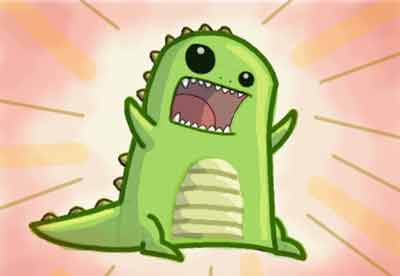
How to draw a dinosaur? Children love to draw animals: a penguin, a puppy, an owl or even a cute dinosaur. This lesson is suitable for a child 5-7 years old.
Step 1
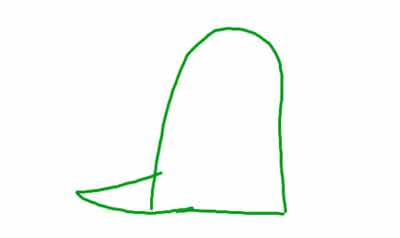
Draw a thimble-like figure for the body and head, draw a sharp, slightly curved triangle for the tail at the bottom left.
Step 2
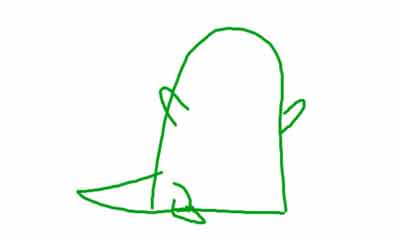
Add the paws and the right leg closest to us.
Step 3
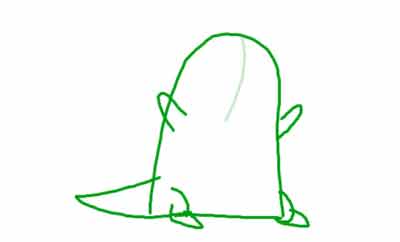
Add a leg that is further away from us. Draw a slightly curved auxiliary vertical line in the middle of the "thimble" from the top to the beginning of the paws. It marks the center of the muzzle.
Step 4
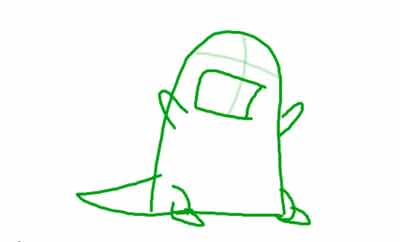
Draw another line that intersects the previous one at a right angle. Just below the intersection point, draw a rectangle for the mouth.
Step 5
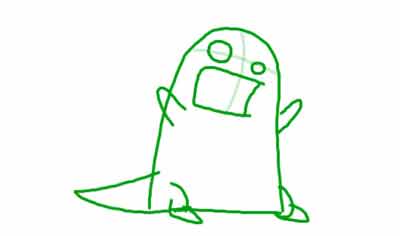
Draw two circles on the horizontal line for the eyes. The right circle is noticeably smaller than the left.
Step 6
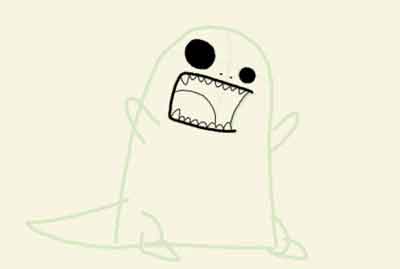
With a dark felt-tip pen or pencil, paint over the eyes, highlight the mouth, draw sharp teeth and outline the tongue of the dinosaur.
Step 7
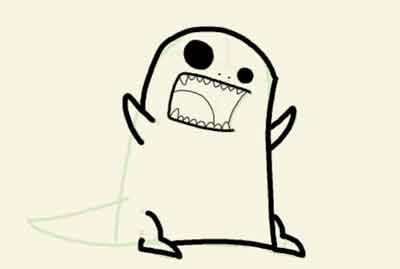
Outline the outline of the beast with the same felt-tip pen.
Step 8
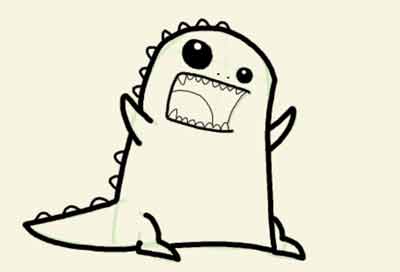
Add the comb and nostrils.
Step 9

Color the baby bright green, breast and comb - yellow, burgundy - mouth, cherry - tongue.
Step 10
Apply slightly darker colors to the torso and chest to add volume to the figure. Make a light cherry background, draw rays coming from the dinosaur.
Drawing of Apatosaurus Arlo from The Good Dinosaur in 10 Steps
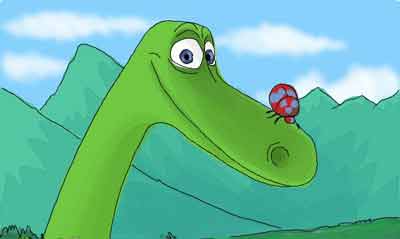
"The Good Dinosaur" is an animated saga in which Apatosaurus Arlo and his human boy friend overcome many obstacles and dangers, moving towards their goal.
Apatosaurus is a giant herbivorous sauropod dinosaur, one of the largest land animals of all time, living between 147 and 137 million years ago during the late Jurassic and early Cretaceous periods. Its fossils have been found in North America and Europe.
This huge herbivore weighed as many as five adult elephants (about 45 tons) and reached 23 meters in length, including the neck and tail.
It had four massive, column-like legs and an extremely long, whipping tail that helped keep it balanced while walking.
Here's how easy it is to draw this adorable cartoon dinosaur just like bunny.
Step 1
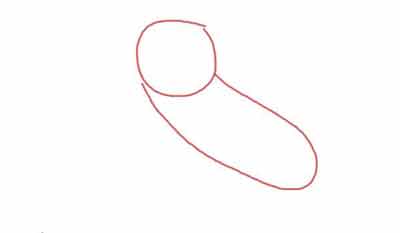
Draw a circle and under it an oval curved to the right for the muzzle.
Step 2
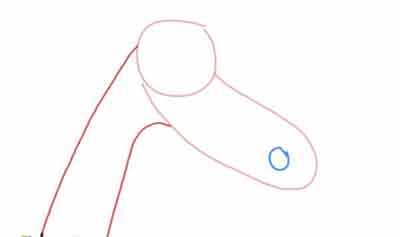
On the left, draw two parallel, slightly curved lines for a long neck. At the bottom of the oval, draw a small circle for the nostril.
Step 3
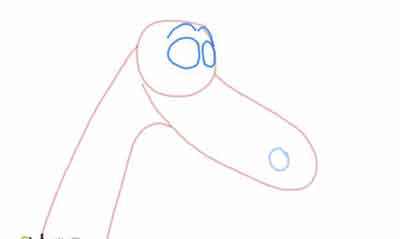
In a large circle, draw two more small ones for the eyes and above them two arcs - skin folds.
Step 4
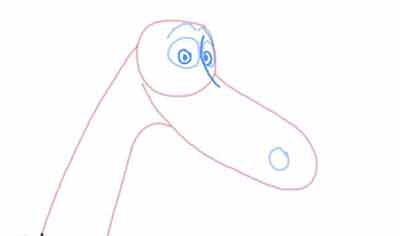
Draw the pupils, mark the middle of the dinosaur's face with a curved line.
Step 5
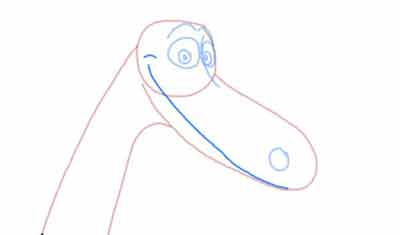
Outline the mouth with a long, curved line.
Step 6
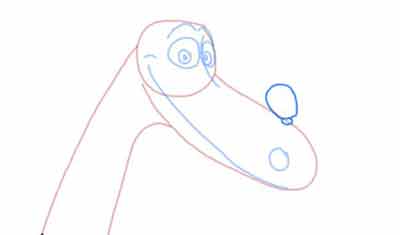
On the muzzle, draw an egg-shaped figure, under it is another small oval for the bug.
Step 7
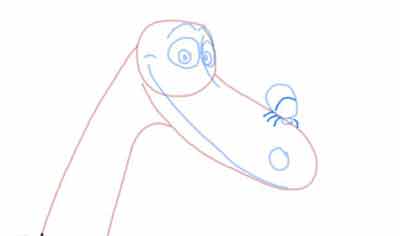
Draw the head and paws of the bug.
Step 8
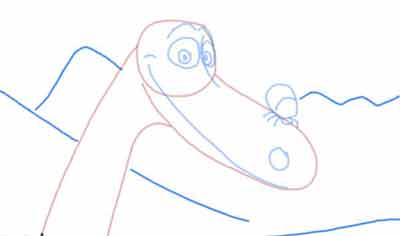
With long wavy lines outline the prehistoric landscape.
Step 9
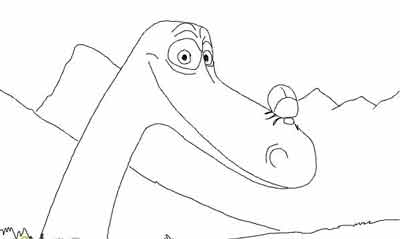
With a felt-tip pen or a dark pencil, circle the outlines of the drawing, adding some small details.
Step 10
Color the drawing. Do not forget to overlay the main colors with darker ones for the shadows, so the dinosaur will be more voluminous and expressive.
How to paint Dinosaur in 12 easy steps
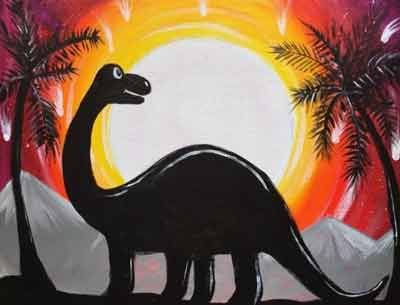
Paint your own dinosaur picture! This easy step by step method is for the absolute beginner.
This is something you can do with your kids!
Step 1
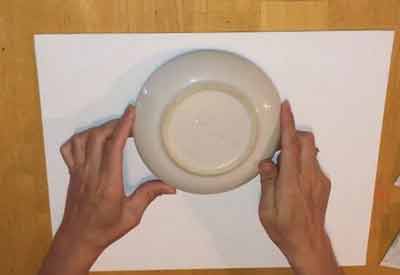
Draw a circle in the middle/top of your canvas. You can use a saucer for this.
Step 2
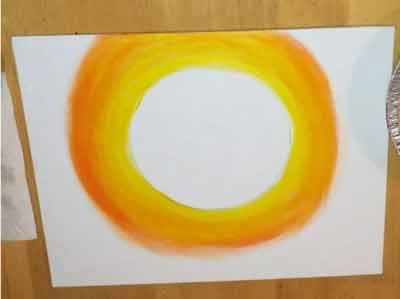
With gouache or acrylics, draw a yellow ring around the circle. While the yellow paint is still wet, add some orange on the outside so that the colors blend a little, forming a smooth transition.
Step 3
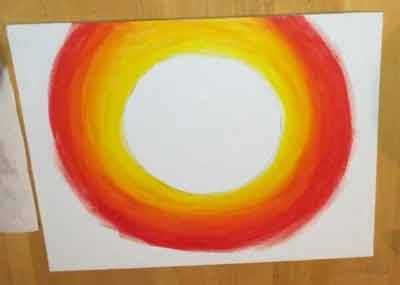
Then add red paint with the same brush without rinsing. Mix red with orange just like you mixed orange with yellow.
Step 4
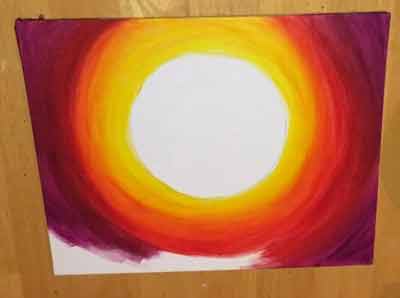
Now it's a turn of dark purple paint around the edges, mix with red. Make sure that the transition from color to color is smooth.
Step 5
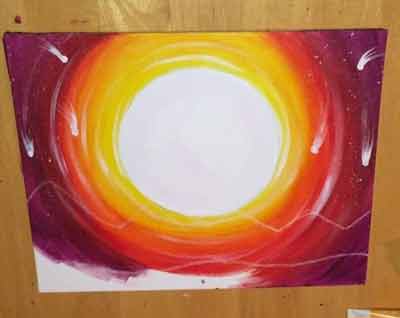
Color the Sun white. It might be silly to draw white on white, but it still makes sense. So we will see the texture of the paint.
With the same paint, draw a few light feathery lines radiating from the Sun. With a toothbrush or paint brush, gently splatter the dinosaur landscape.
Step 6
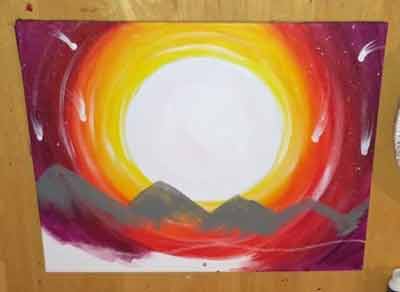
Draw the mountains and the bottom line with white chalk.
Just under the Sun, add a zigzag line of mountains. Then, about three centimeters from the bottom of the picture, draw a jagged line to indicate the ground on which this dinosaur will stand.
Color the mountains in a "neutral gray" color.
Step 7
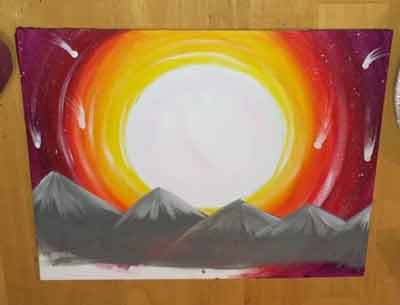
Use a flat brush to paint white lines on the tips of the mountains.
Step 8
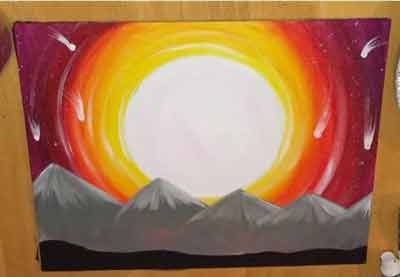
Paint the entire bottom part black.
Step 9
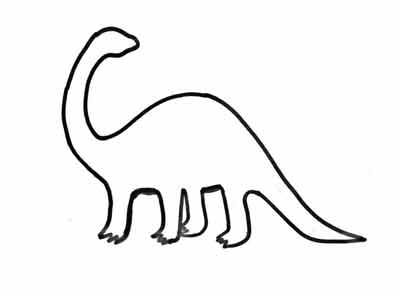
Print out the silhouette of a dinosaur or simply translate from a computer screen.
Step 10

Transfer the silhouette to the picture using carbon paper.
Step 11
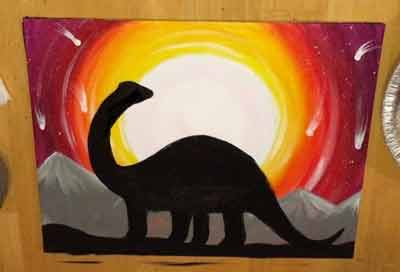
Paint over the silhouette with black paint.
Step 12
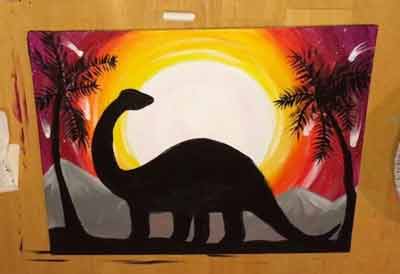
Draw palm trees around the edges first with a pencil, and then paint over with black paint. You can also do without them!
Optional: Highlight the shadows on the palm trees with white, make it shine like a light bulb
Step 13
Make the dinosaur look more like Arlo from The Good Dinosaur by painting the face and shadows on the back and legs with white paint.
That's all! Now it's your turn to draw your dinosaur.
See my top drawing tutorial on this blog